Infrastructure as code with Terraform and GitLab
原文:https://docs.gitlab.com/ee/user/infrastructure/index.html
- Motivation
- GitLab managed Terraform State
- Permissions for using Terraform
- Get started using local development
- Get started using GitLab CI
- Configure the backend
- Example project
- Output Terraform Plan information into a merge request
Infrastructure as code with Terraform and GitLab
Motivation
GitLab 中的 Terraform 集成功能使您的 GitOps /基础设施即代码(IaC)工作流能够与 GitLab 的身份验证和授权结合在一起. 这些功能着重于降低团队采用 Terraform,在 GitLab 中有效协作以及支持 Terraform 最佳实践的准入门槛.
GitLab managed Terraform State
在 GitLab 13.0 中引入 .
Terraform 远程后端使您可以将状态文件存储在远程共享存储中. GitLab 使用Terraform HTTP 后端将状态文件安全地存储在本地存储(默认)或您选择的远程存储中 .
由 GitLab 管理的 Terraform 状态后端可以轻松安全地存储 Terraform 状态,并使您免于设置其他远程资源(如 Amazon S3 或 Google Cloud Storage). 其功能包括:
- 在传输和静止时都支持状态文件的加密.
- 锁定和解锁状态.
- 远程 Terraform 计划并执行.
要开始使用 GitLab 管理的 Terraform State,有两种不同的选择:
Permissions for using Terraform
在 GitLab 版本 13.1 中,需要维护者访问权限才能使用 GitLab 管理的 Terraform 状态后端. 在 GitLab 版本 13.2 和更高版本中,需要维护者访问权限才能锁定,解锁和写入状态(使用terraform apply ),而需要开发人员访问权限来读取状态(使用terraform plan -lock=false ).
Get started using local development
如果您计划仅运行terraform plan并从本地计算机上执行terraform plan terraform apply命令,这是一种入门的简单方法:
- 在您的 GitLab 实例上创建项目.
- 导航 设置>常规,并记下您的项目名称和项目 ID .
Define the Terraform backend in your Terraform project to be:
terraform { backend "http" { } }- 使用
api范围创建一个个人访问令牌 .
- 使用
在本地计算机上,运行
terraform init,传入以下选项,并用相关值替换<YOUR-PROJECT-NAME>,<YOUR-PROJECT-ID>,<YOUR-USERNAME>和<YOUR-ACCESS-TOKEN>. 此命令将初始化 Terraform 状态,并将该状态存储在 GitLab 项目中. 这个例子使用gitlab.com:terraform init \ -backend-config="address=https://gitlab.com/api/v4/projects/<YOUR-PROJECT-ID>/terraform/state/<YOUR-PROJECT-NAME>" \ -backend-config="lock_address=https://gitlab.com/api/v4/projects/<YOUR-PROJECT-ID>/terraform/state/<YOUR-PROJECT-NAME>/lock" \ -backend-config="unlock_address=https://gitlab.com/api/v4/projects/<YOUR-PROJECT-ID>/terraform/state/<YOUR-PROJECT-NAME>/lock" \ -backend-config="username=<YOUR-USERNAME>" \ -backend-config="password=<YOUR-ACCESS-TOKEN>" \ -backend-config="lock_method=POST" \ -backend-config="unlock_method=DELETE" \ -backend-config="retry_wait_min=5"
Next, configure the backend.
Get started using GitLab CI
如果您不想开始本地开发,也可以使用 GitLab CI 来运行terraform plan和terraform apply命令.
Next, configure the backend.
Configure the backend
执行terraform init命令后,必须配置 Terraform 后端和 CI YAML 文件:
在 Terraform 项目中,通过在
.tf文件(例如backend.tf)中添加以下代码块来定义远程后端,以定义HTTP后端:terraform { backend "http" { } }- 在项目存储库的根目录中,配置
.gitlab-ci.yaml文件. 本示例使用一个包含gitlab-terraform帮助器的预构建图像. 有关受支持的 Terraform 版本,请参见GitLab Terraform Images 项目 .
image: registry.gitlab.com/gitlab-org/terraform-images/stable:latest- 在
.gitlab-ci.yaml文件中,定义一些环境变量以简化开发. 在此示例中,TF_ROOT是必须执行 Terraform 命令的目录,TF_ADDRESS是该管道在其上运行的 GitLab 实例上的状态的 URL,并且TF_ADDRESS的最后路径段是 Terraform 状态的名称. 项目可能具有多个状态,并且该名称是任意的,因此在此示例中,我们将其设置为项目的名称,并确保使用基于缓存的缓存键在管道中的作业之间缓存.terraform目录.州名:
variables: TF_ROOT: ${CI_PROJECT_DIR}/environments/cloudflare/production TF_ADDRESS: ${CI_API_V4_URL}/projects/${CI_PROJECT_ID}/terraform/state/${CI_PROJECT_NAME} cache: key: ${CI_PROJECT_NAME} paths: - ${TF_ROOT}/.terraform- 在
before_script,更改为TF_ROOT:
before_script: - cd ${TF_ROOT} stages: - prepare - validate - build - deploy init: stage: prepare script: - gitlab-terraform init validate: stage: validate script: - gitlab-terraform validate plan: stage: build script: - gitlab-terraform plan - gitlab-terraform plan-json artifacts: name: plan paths: - ${TF_ROOT}/plan.cache reports: terraform: ${TF_ROOT}/plan.json apply: stage: deploy environment: name: production script: - gitlab-terraform apply dependencies: - plan when: manual only: - master- 将项目推送到 GitLab,这将触发 CI 作业管道. 该管道运行
gitlab-terraform init,gitlab-terraform validate和gitlab-terraform plan命令.
- 在项目存储库的根目录中,配置
以上terraform命令的输出应在作业日志中可见.
Example project
请参阅使用 GitLab 和 Terraform 在自定义 VPC 中部署基本 AWS EC2 的参考项目 .
Output Terraform Plan information into a merge request
使用GitLab Terraform Report 工件 ,您可以将terraform plan运行中的详细信息直接暴露到合并请求小部件中,使您能够查看有关 Terraform 将创建,修改或销毁的资源的统计信息.
让我们探索如何配置 GitLab Terraform Report 工件. 您可以使用包含上述gitlab-terraform帮助器的预构建映像,其中gitlab-terraform plan-json输出所需的工件,或者您可以按以下方式手动进行配置:
为简单起见,让我们定义一些可重用的变量,以允许我们多次引用这些文件:
variables: PLAN: plan.cache PLAN_JSON: plan.json- 安装
jq,这是一种轻巧灵活的命令行 JSON 处理器 .
- 安装
为特定的
jq命令创建一个别名,该别名解析出我们要从terraform plan输出中提取的信息:before_script: - apk --no-cache add jq - alias convert_report="jq -r '([.resource_changes[]?.change.actions?]|flatten)|{\"create\":(map(select(.==\"create\"))|length),\"update\":(map(select(.==\"update\"))|length),\"delete\":(map(select(.==\"delete\"))|length)}'"注意:在使用 Bash 的发行版(例如,Ubuntu)中,
alias语句不会在非交互模式下扩展. 如果您的管道失败并显示错误convert_report: command not found,则可以通过在脚本中添加shopt命令来明确激活别名扩展:before_script: - shopt -s expand_aliases - alias convert_report="jq -r '([.resource_changes[]?.change.actions?]|flatten)|{\"create\":(map(select(.==\"create\"))|length),\"update\":(map(select(.==\"update\"))|length),\"delete\":(map(select(.==\"delete\"))|length)}'"- 定义运行
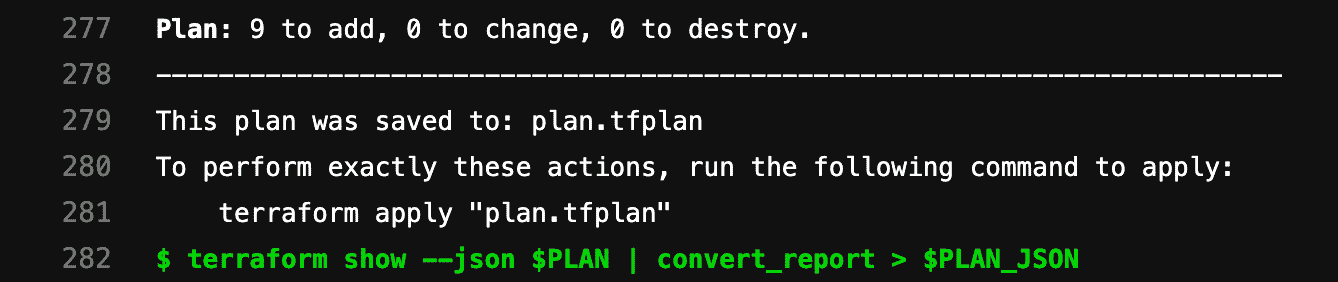
terraform plan和terraform show的script. 这些命令通过管道PLAN_JSON输出并将相关位转换为存储变量PLAN_JSON. 此 JSON 用于创建GitLab Terraform Report 工件 . Terraform 报告获取 Terraformtfplan.json文件. 收集的 Terraform 计划报告作为工件上传到 GitLab,并在合并请求中显示.
plan: stage: build script: - terraform plan -out=$PLAN - terraform show --json $PLAN | convert_report > $PLAN_JSON artifacts: reports: terraform: $PLAN_JSON有关使用预构建图像的完整示例,请参见Example
.gitlab-ci.yaml文件 .有关显示多个报告的示例,请参见
.gitlab-ci.yaml多个报告文件 .- 定义运行
运行管道会在合并请求中显示小部件,如下所示:

Clicking the 查看完整日志 button in the widget takes you directly to the plan output present in the pipeline logs:


Example .gitlab-ci.yaml file
image: registry.gitlab.com/gitlab-org/terraform-images/stable:latest

variables:
  TF_ROOT: ${CI_PROJECT_DIR}/environments/cloudflare/production
  TF_ADDRESS: ${CI_API_V4_URL}/projects/${CI_PROJECT_ID}/terraform/state/${CI_PROJECT_NAME}

cache:
  key: ${CI_PROJECT_NAME}
  paths:
    - ${TF_ROOT}/.terraform

before_script:
  - cd ${TF_ROOT}

stages:
  - prepare
  - validate
  - build
  - deploy

init:
  stage: prepare
  script:
    - gitlab-terraform init

validate:
  stage: validate
  script:
    - gitlab-terraform validate

plan:
  stage: build
  script:
    - gitlab-terraform plan
    - gitlab-terraform plan-json
  artifacts:
    name: plan
    paths:
      - ${TF_ROOT}/plan.cache
    reports:
      terraform: ${TF_ROOT}/plan.json

apply:
  stage: deploy
  environment:
    name: production
  script:
    - gitlab-terraform apply
  dependencies:
    - plan
  when: manual
  only:
    - master
Multiple Terraform Plan reports
从 13.2 开始,您可以在"合并请求"页面上显示多个报告. 报告还将显示artifact: name: 有关建议的设置,请参见下面的示例.
image:
  name: registry.gitlab.com/gitlab-org/gitlab-build-images:terraform
  entrypoint:
    - '/usr/bin/env'
    - 'PATH=/usr/local/sbin:/usr/local/bin:/usr/sbin:/usr/bin:/sbin:/bin'

cache:
  paths:
    - .terraform

stages:
  - build

.terraform-plan-generation:
  stage: build
  variables:
    PLAN: plan.tfplan
    JSON_PLAN_FILE: tfplan.json
  before_script:
    - cd ${TERRAFORM_DIRECTORY}
    - terraform --version
    - terraform init
    - apk --no-cache add jq
  script:
    - terraform validate
    - terraform plan -out=${PLAN}
    - terraform show --json ${PLAN} | jq -r '([.resource_changes[]?.change.actions?]|flatten)|{"create":(map(select(.=="create"))|length),"update":(map(select(.=="update"))|length),"delete":(map(select(.=="delete"))|length)}' > ${JSON_PLAN_FILE}
  artifacts:
    reports:
      terraform: ${TERRAFORM_DIRECTORY}/${JSON_PLAN_FILE}

review_plan:
  extends: .terraform-plan-generation
  variables:
    TERRAFORM_DIRECTORY: "review/"
  # Review will not include an artifact name

staging_plan:
  extends: .terraform-plan-generation
  variables:
    TERRAFORM_DIRECTORY: "staging/"
  artifacts:
    name: Staging

production_plan:
  extends: .terraform-plan-generation
  variables:
    TERRAFORM_DIRECTORY: "production/"
  artifacts:
    name: Production